Hello dear DLL Downloader.com visitors. In this writing, we will explain how manual updates to the Windows 8.1 and Windows 8 operating systems are done. The update process can help you to fix dll errors in certain situations.
Steps to Update Windows 8.1 and Windows 8
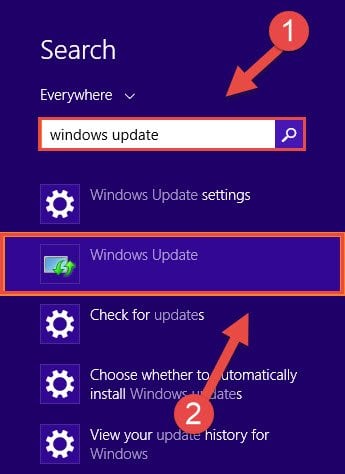
- Open the Metro interface by clicking the “Windows” key (it’s the key with the Windows logo found on the bottom of the keyboard 2 keys to the left of the spacebar), and type “Windows Update” on your keyboard. Click on the “Windows Update” result that appears in the search result list on the right of the screen.
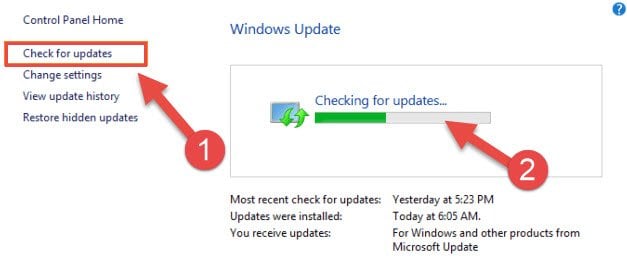
- Click on the “Check for Updates” link that appears on the left side of the Windows Update window that comes up. It will start looking for update packs that can be installed.
- If an installable update pack is not found, you will come across a screen like the one below. This means that you have an updated operating system.

Step 3: An installable update pack for Windows 8.1 / 8 was not found (because it’s already updated) - If you see a screen like the one below, you can start the installation process by clicking on the “Install Updates” button.
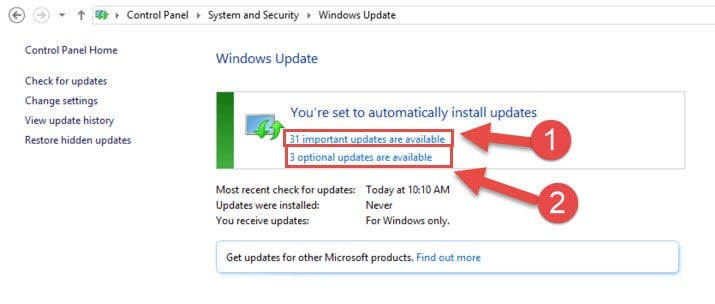
- If you see a screen like the one below, it means that installable update packs have been found but these update packs are not very important. You can install these updates by selecting all installable updates and in the window that comes up choosing all the update packs and clicking on the “Ok”.

Step 4: Installable update packs were found for Windows 8.1 / 8 - When the installation process is complete, your computer will need to be restarted. You will see a warning message because of this in the Windows Update window. Try running the application that gave you the dll error again.


